Tips & Tricks: International Labels to Print to a Standard Printer (Endicia)
As you already know, ShipWorks is very customizable. We try and give our customers multiple ways to do things so that it fits with unique business practices, rather than having customers conform their business practices to ShipWorks software.
Printing international shipping labels is a great example of how we try and offer multiple ways to do things. Last week we talked about printing labels for international shipments sent via USPS.
Today, we’re creating a process for Endicia customers who want international labels to print to a standard printer with ease. Once this set-up is done, it will eliminate extra work in the future on printing international labels.
Creating the Standard 4×6 label template
1. In ShipWorks, select MANAGE>TEMPLATES. Then select the LABELS>STANDARD template.
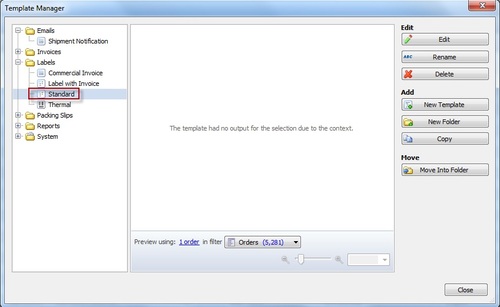
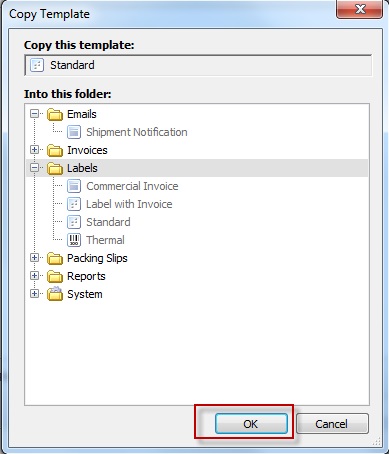
2. Right click on the STANDARD template and select COPY. Then, click OK
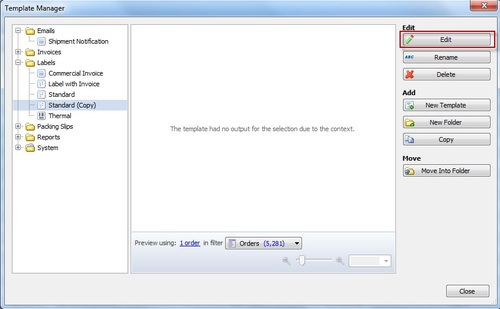
3. Select the STANDARD (COPY) template and click EDIT
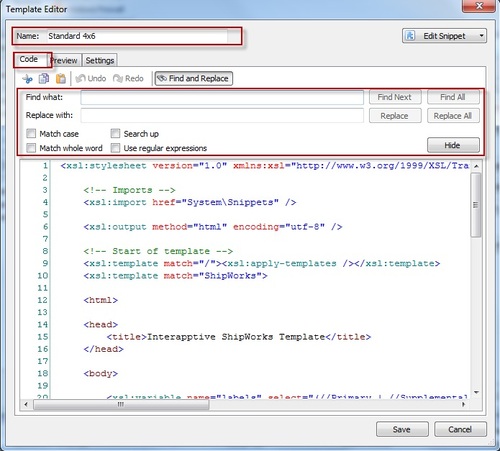
4. When the TEMPLATE EDITOR opens, select the CODE tab. Next, name the template STANDARD 4×6. Then, press CTRL +F on your keyboard to open a search dialog box.
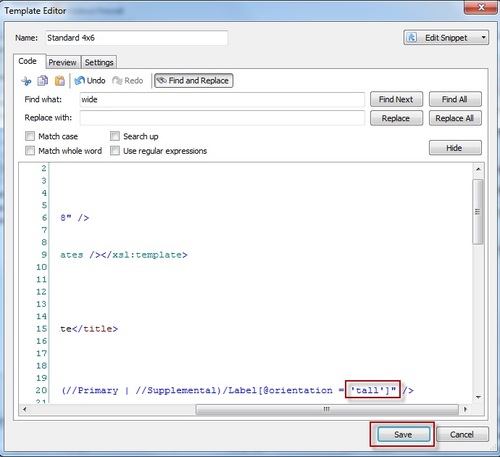
5. In the FIND WHAT box, type WIDE. Then, click FIND NEXT.
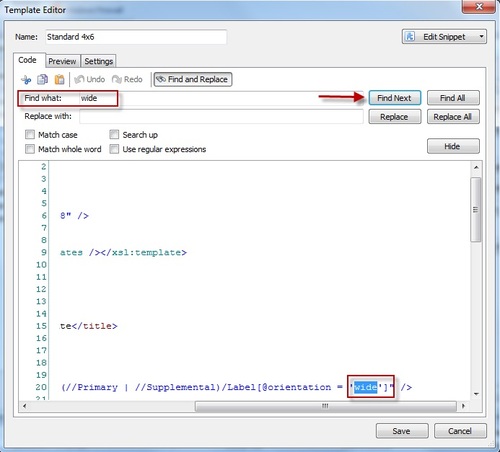
6. Note that the word WIDE is highlighted in blue. Select the word WIDE and change it to TALL (be sure to leave the single tick marks). Then, click SAVE.
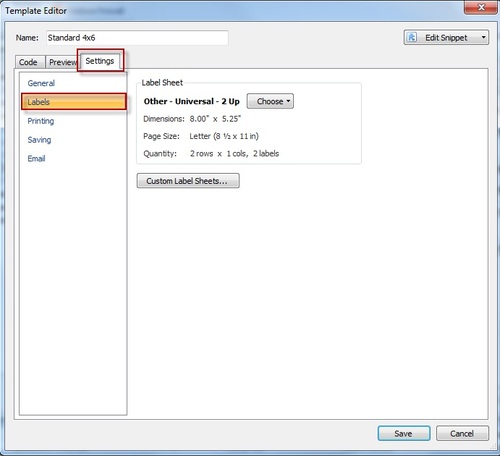
7. Click on the SETTINGS tab. Then click on LABELS.
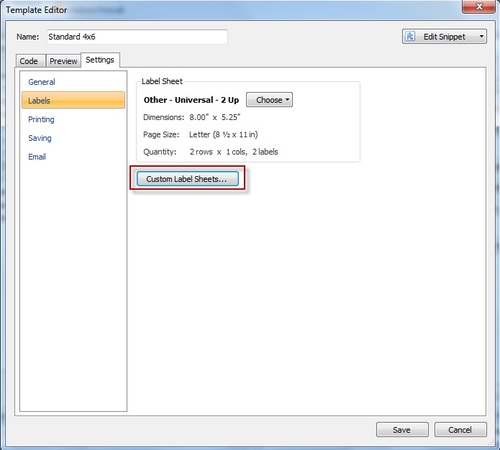
8. Click on the CUSTOM LABEL SHEET BUTTON.
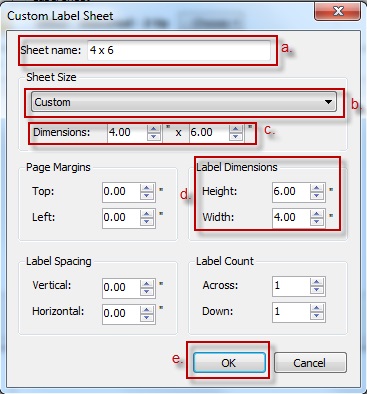
9. Click the NEW button. Then:
- Name the label sheet ‘4 x 6’
- Change the SHEET SIZE to CUSTOM
- Change the DIMENSIONS to 4.00 x 6.00
- Change the Label Dimensions HEIGHT to 6.00 and the WIDTH to 4.00
- Click OK
- Click CLOSE

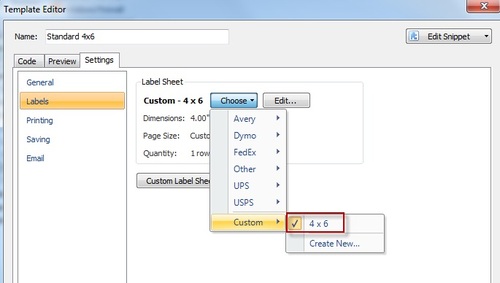
10. Click the CHOOSE button and select CHOOSE>CUSTOM>4×6
11. Select PRINTING on the left side of the TEMPLATE EDITOR. Then, select your THERMAL printer from the PRINTER drop-down. Then, click on the SAVE button.
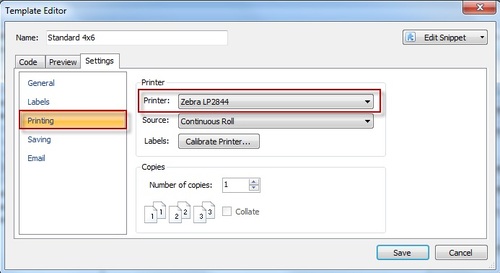
Configuring the Domestic Labels Template
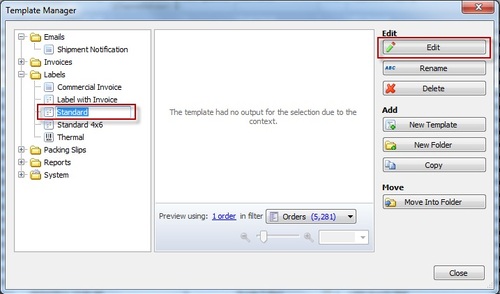
12. On the TEMPLATE MANAGER screen, select the LABELS>STANDARD template. Then, click EDIT.
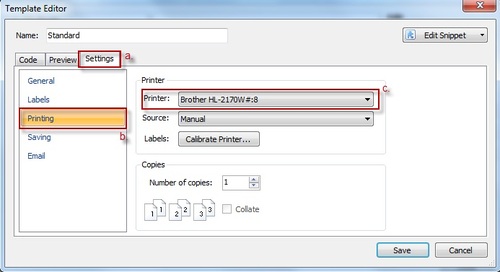
13. On the Template Editor screen:
- Select the SETTINGS tab
- Select PRINTING
- Select your standard 8.5" x 11" printer from the PRINTER drop-down
- Click SAVE. Then, CLOSE
CONFIGURING ENDICIA PRINTING RULES
1. In ShipWorks, select MANAGE> SHIPPING SETTINGS

2. On the SHIPPING SETTINGS screen, select USPS (ENDICIA). Then, on the SETTINGS tab, uncheck the box for THE LABELS WILL BE PRINTED WITH A THERMAL PRINTER
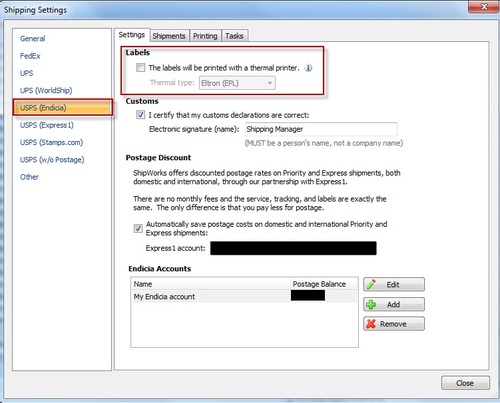
3. With USPS (ENDICIA) still selected, click on the PRINTING tab.
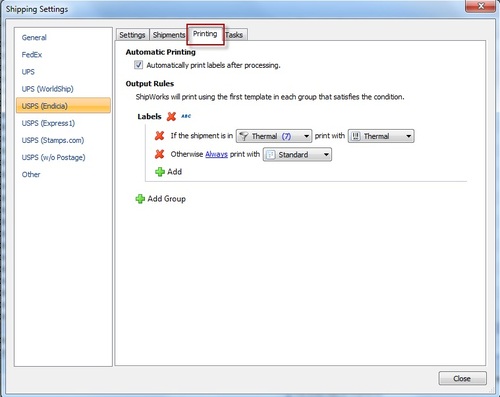
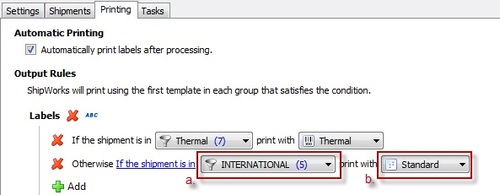
4. Under OUTPUT RULES, find the line that reads OTHERWISE ALWAYS PRINT WITH STANDARD. Click on the blue word ALWAYS and select IF THE SHIPMENT IS IN
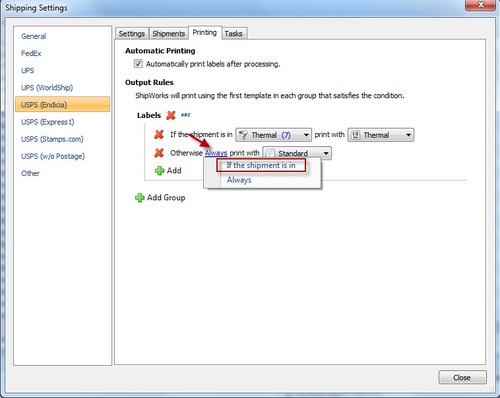
5.Click the drop-down menu to the right of IF THE SHIPMENT IS IN and click CREATE
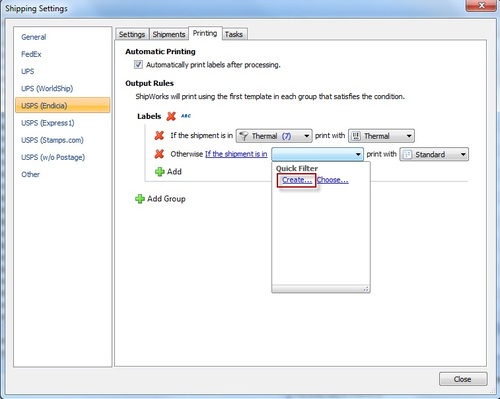
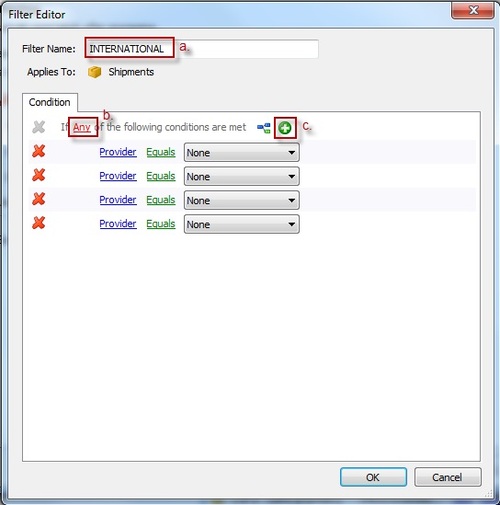
6.When the FILTER EDITOR opens:
- Name the filter INTERNATIONAL
Change the word ALL to ANY
Click the ADD CONDITION button 4x times (button is a green circle with a white +) - When you’re finished, the Filter Editor should look like the screen shot below.

7. In the first condition line:
- Click on the word PROVIDER and select SHIP TO>ADDRESS>COUNTRY.
- Click on the word EQUALS and change it to DOES NOT EQUAL
- Type UNITED STATES for the country.
- When you are finished, the Filters Editor should look like the screen shot below.

8. On the second condition line:
- Click on the word PROVIDER and change it to SHIP TO>ADDRESS>CITY
- Leave it as EQUALS
- Type APO for the city name
- Repeat the above steps for the third condition line, entering FPO as the city.
- Repeat the above steps for the fourth condition line, entering DPO as the city.
- When you’re finished, the Filters Editor should look like the screenshot below

9. Click OK
10. Back on the PRINTING tab:
- Select the INTERNATIONAL filter from the filter drop-down menu
- Click on the template drop-down menu (after the words PRINT WITH) and select LABELS>STANDARD

11. Click on the ADD button
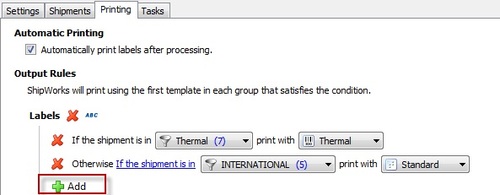
12. In the third label rule:
- Click on the blue text IF THE SHIPMENT IS IN and change it to ALWAYS
- From the filter drop-down, select LABELS>STANDARD 4X6

13. Click Close
