Tips & Tricks: Printing Endicia Envelopes to a Thermal Printer
Since we just got back from Atlanta where we were at an Endicia conference (it was a great event!), it seems appropriate that today’s tips and tricks is about something Endicia related.
A common question we get from customer is how do you print Endicia Envelopes to a thermal printer. It involves three major steps: copying an existing template, editing the template to work with a thermal printer, and modifying your printing setup. Follow the steps below to configure this option.
Copying Your Template
1. In ShipWorks, go to Manage > Templates.
2. Expand the Labels folder, select your Standard label template, and click Copy.
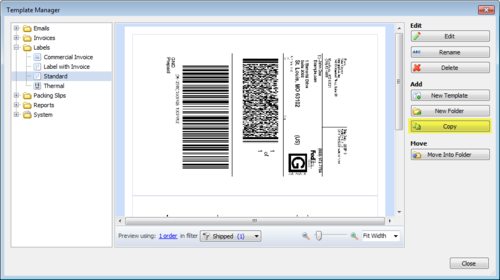
3. Confirm copying the template by clicking OK.
Editing Your Template
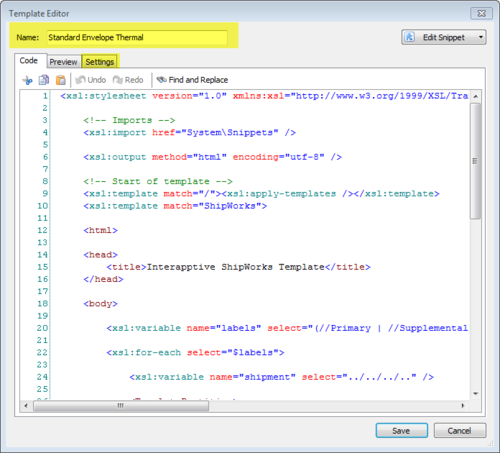
1. Select your copied template and click Edit.
2. Name the template ‘Standard Envelope Thermal’, and then click the Settings tab
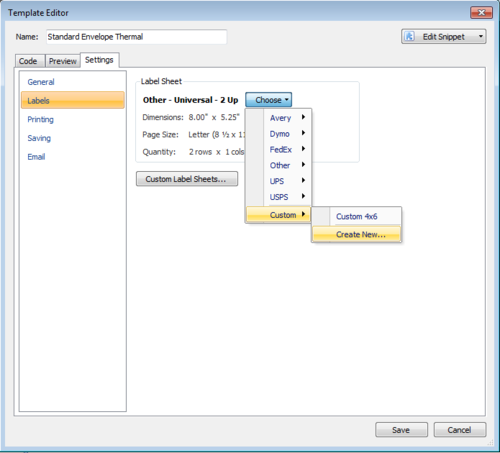
3. Select Labels > Choose > Custom Label Sheets > Create New.
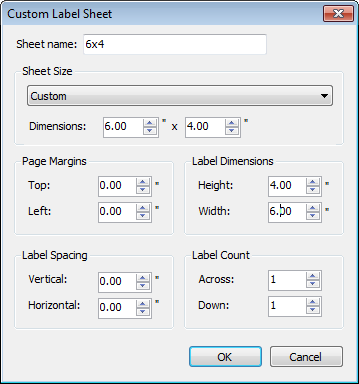
4. Modify your label sheet to include the settings below, and then click OK to save the changes.
(a) Sheet Size: Custom
(b) Dimensions: 6.00" x 4.00"
© Label Dimensions: Height:
5. Proceed to the Modifying Your Printing Setup section.
Modifying Your Printing Setup
1. After creating a label sheet, click Printing from the left-side menu.
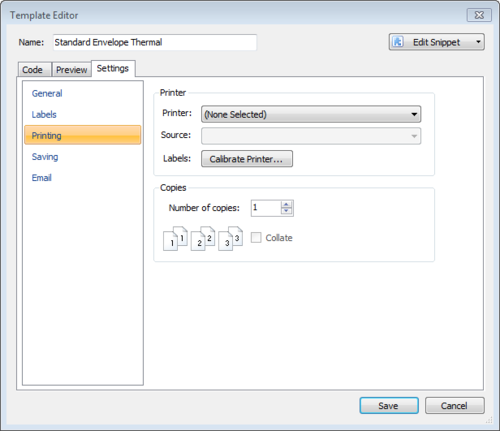
2. Select the correct thermal printer and click Save and Close.
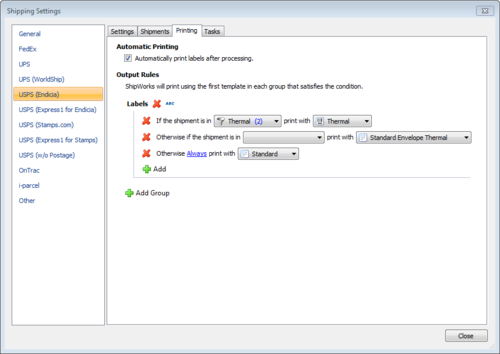
3. Navigate to Manage > Shipping Settings > Choose USPS (Endicia) > Printing tab.
4. Click the green Add Rule button and modify your setup as follows:
(a) First line: If the shipment is in thermal (filter), print with thermal (template).
(b) Second line: Otherwise if the shipment is in (blank), print with Standard Envelope Thermal (template).
© Third Line: Otherwise Always print with Standard (template).
5. Click the blank drop-down menu and select Create.
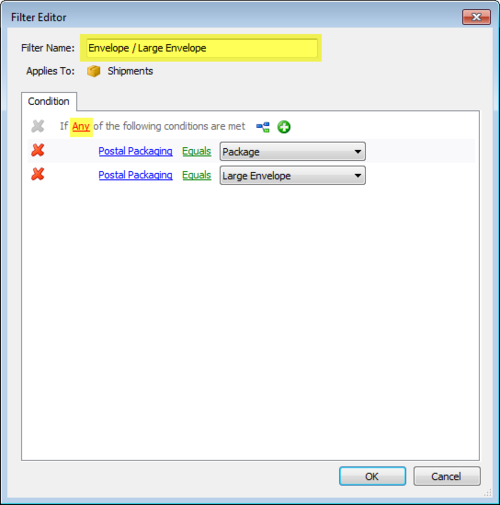
6. Name your filter ‘Envelope / Large Envelope’ and set the conditions as follows:
(a) Change the red All to Any.
(b) Click the green Add Condition button and select Postal > Packaging.
© Select Envelope from the drop-down menu.
(d) Click the green Add Condition button and select Postal > Packaging.
(e) Select Large Envelope from the drop-down menu.
7. Click OK to auto-populate the (previously) blank field. Your final printing rules should look identical to Example 1.8.
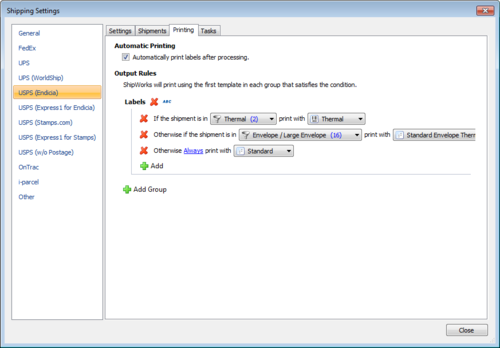
8. Click Close to save changes.
Do you need more help or have another question? Send us a message or give us a call and someone from our awesome customer support team in St. Louis will get back to you.