Tips & Tricks: Printing USPS International Shipments on Paper Labels, not Thermal Labels
Have you ever wondered what to do if your international shipment labels sent via USPS are printing on thermal labels, but you want to print them on paper?
There are two ways to solve the issue: 1. Toggle back and forth on your printing settings and 2. Set up an international filter so you can process international shipments once a day and alleviate the unnecessary toggling. It’s easy to do either of these, so pick whichever option makes the most sense for your business.
Part One: Print international shipping labels sent via USPS on paper, not thermal labels:
1. Go to Manage > Shipping Settings.
2. From the left-side menu, select your USPS provider (Endicia, Express1, or Stamps.com) and verify that the shipping rules look like the following: If the shipment is in Thermal, print with Thermal. Otherwise, Always print with Standard. 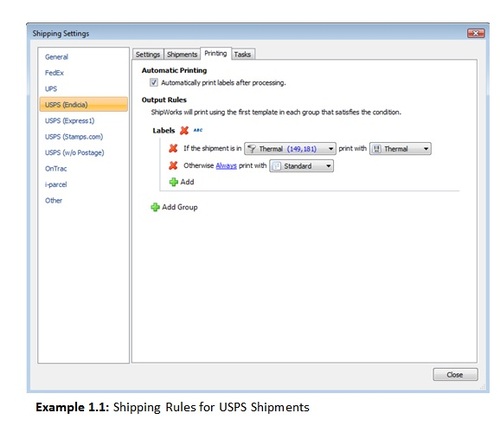
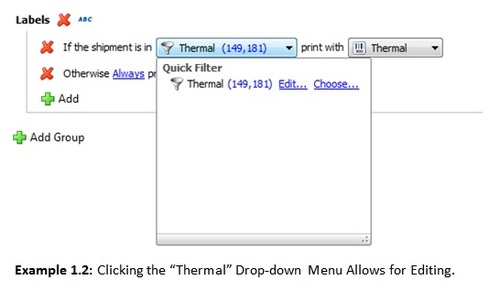
3. Click on the “Thermal” drop-down menu to verify that your “Thermal” filter is set up correctly. Click “Edit”.
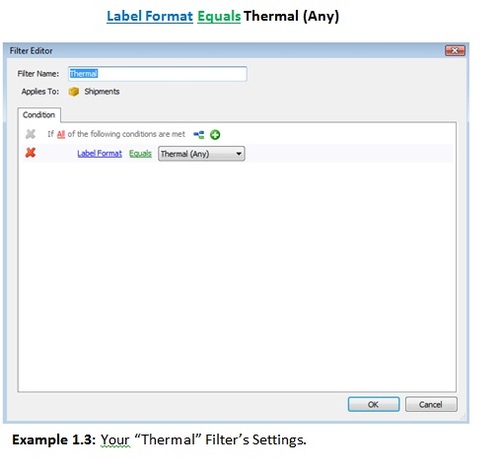
4. Your “Thermal” filter’s settings should be set up as follows (Example 1.3):
5. Click “OK” to save any changes.
6. In Manage > Shipping Settings, select your USPS shipping provider (Endicia, Express1, Stamps.com) and navigate to the “Settings” tab.

7. Verify that your labels are not being downloaded with a thermal printer by making sure the checkbox is blank (as in Example 1.5).

8. Click “Close” to save the changes.
Part Two: Organizing Your Work Flow by Using Filters
When using this method, it can be helpful to process international shipments at a different time than normal shipments. This is to minimize clicking “labels will be printed with a thermal printer” box repeatedly (and thereby preventing processing errors).
To separate your international orders from other orders, simply create a filter.
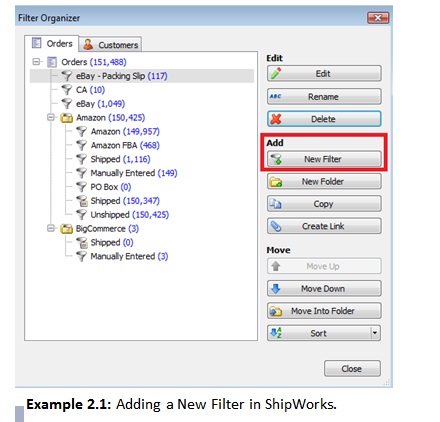
1. Go to Manage > Filters > New Filter.
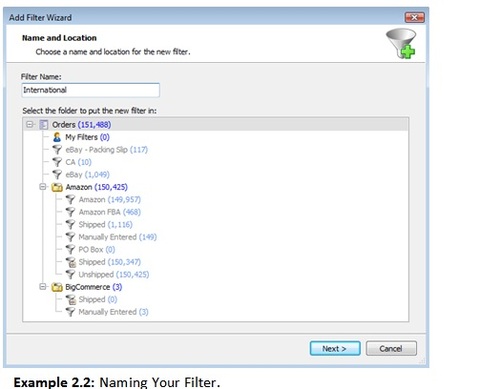
2. Type your filter’s name, like “International” and click “Next” (Example 2.2).
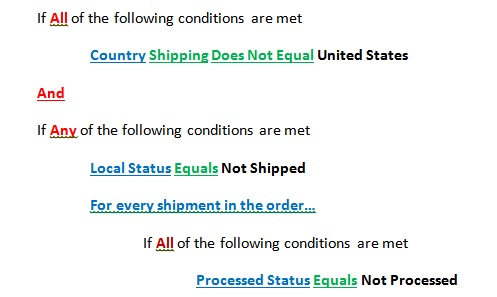
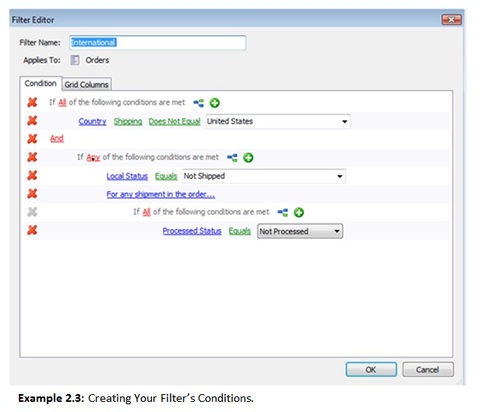
3. Create the conditions (Example 2.3) as follows:
4. Click “OK” to save your settings.
5. Optional: Modify your filter’s view by selecting the gride columns you want displayed.
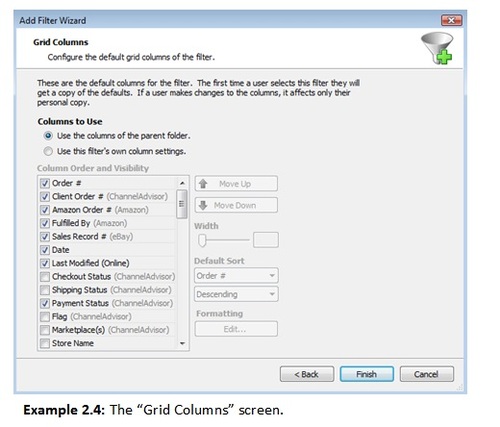
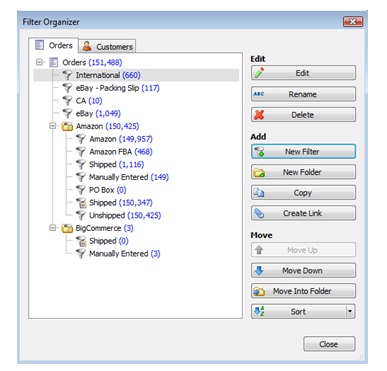
6. Your new filter should now be displayed in the “Filter Organizer” screen. Click “Finish” and “Close” to save your changes.
